Knee-to-Wall Ankle Mobilization
3 × 10 reps per side
Use the knee-to-wall drill to practice ankle dorsiflexion with the heel and forefoot grounded, and compare comfortable range between sides.
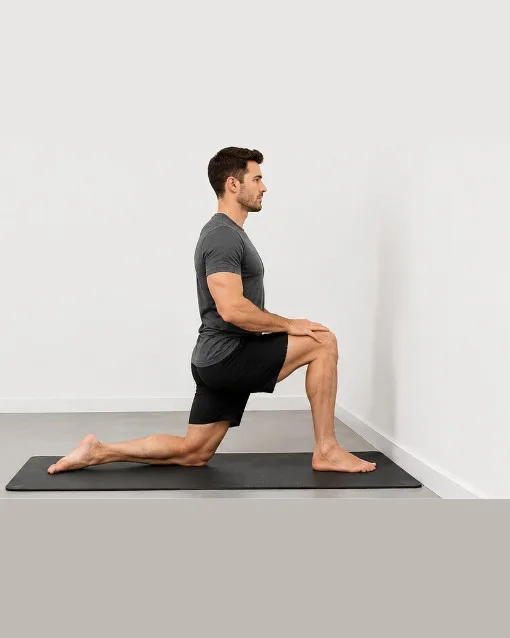
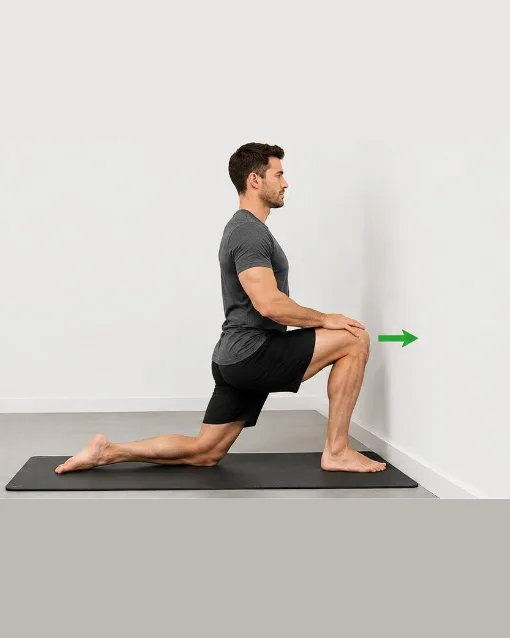
How to do it
- Half-kneel with the front foot a few inches from a wall, pointing straight at it.
- Keep the front heel, base of the big toe and base of the little toe grounded.
- Guide the front knee toward the wall over the second or third toe without collapsing the arch.
- Adjust the foot-to-wall distance so the knee can touch without the heel lifting or the foot turning out.
- Return and repeat smoothly through a comfortable range.
Form cues
- Keep the whole forefoot and heel grounded.
- Move in small, controlled glides without bouncing.
- Reduce the range if front-of-ankle pinching increases.
Why this exercise helps
Ankle dorsiflexion is the motion that lets the shin travel forward over the foot. It contributes to walking, stairs, squats, and lunges because the body needs to move over a planted foot without immediately lifting the heel. The knee-to-wall drill practices that motion under light load while the three main foot-contact points stay grounded. The bent-knee position places more emphasis on the soleus and ankle joint than a straight-knee calf stretch. It is a mobility drill, not a diagnosis or a guarantee that ankle range is the only factor limiting a squat. Compare changes using the same foot position and setup rather than chasing a universal distance.
Stop or modify if
- Letting the heel lift to reach the wall. Move the foot closer and keep the heel heavy instead.
- Allowing the arch to collapse or the knee to fall inward. Guide the knee toward the second or third toe while maintaining contact through the heel and both sides of the forefoot.
- Turning the foot outward to create extra distance. Keep the foot facing forward so repeated measurements are comparable.
- Driving through a sharp pinch at the front of the ankle. Reduce the range; discomfort that persists or worsens needs assessment rather than more force.
Modifications and progressions
- Start with the front foot close to the wall and use a smaller, comfortable glide. Increase the distance only when every repetition keeps the heel down.
- Hold a wall or chair for balance so balance does not limit the ankle motion.
- To track range, measure from the longest toe to the wall using the same stance each time. Treat the number as your own baseline, not a pass-or-fail standard.
Muscles worked
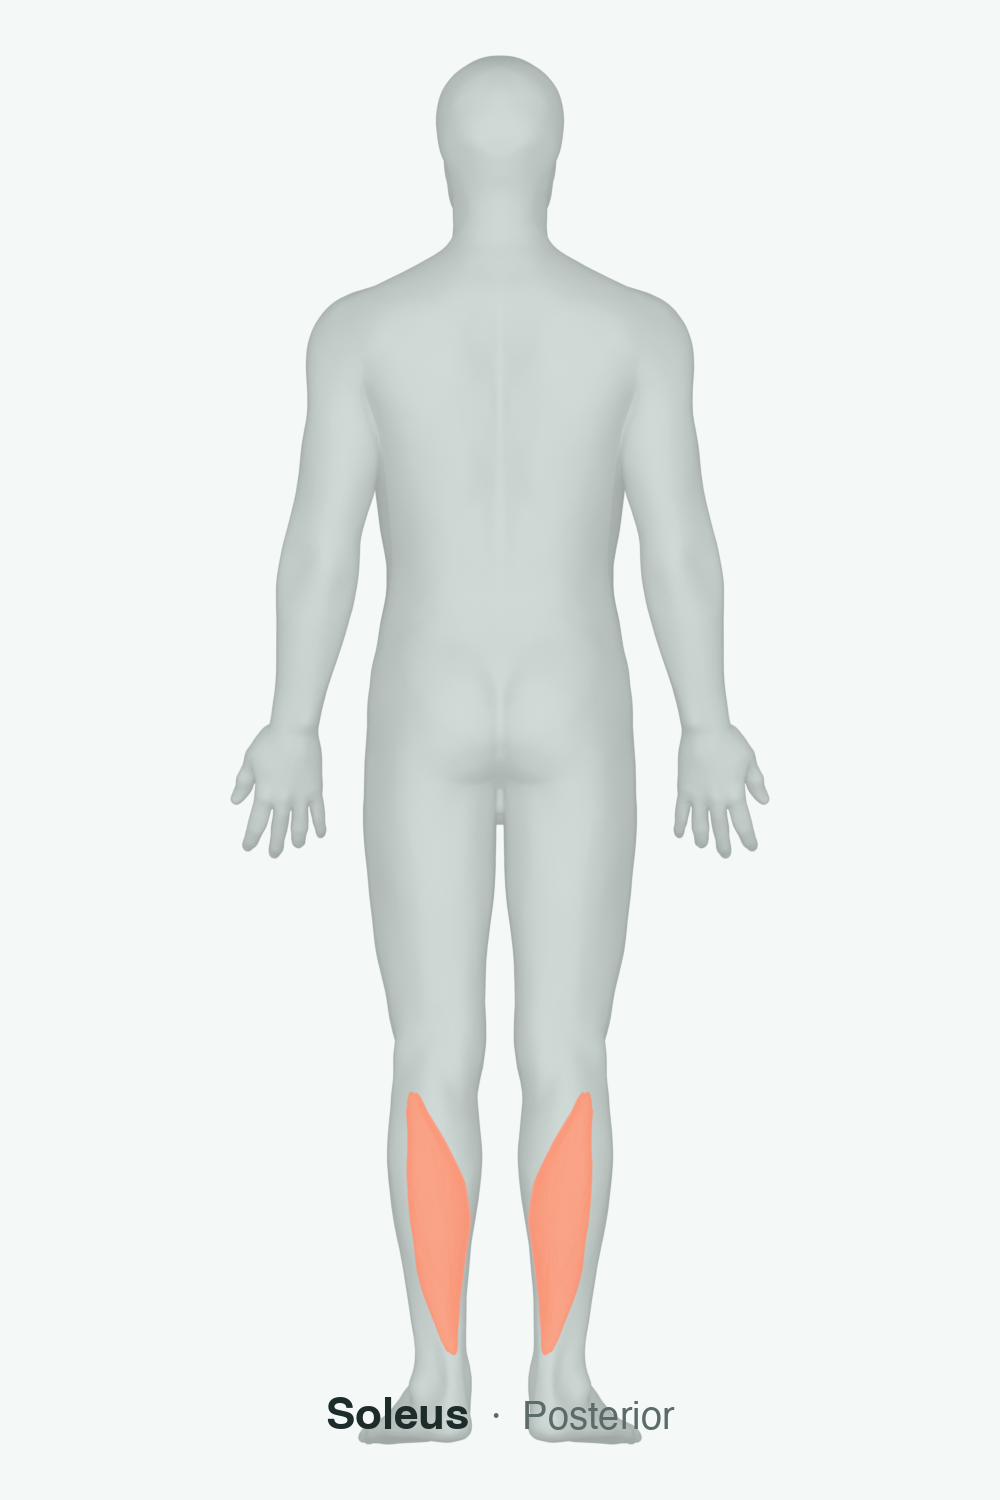
Stretches: soleus
Part of a program
Part of Front Splits
This exercise is one move. Front Splits puts it in a plan — so you know what to do, in what order, and how much, week by week.
- Sequenced & dosed — the right exercises, in the right order, at the right volume.
- Progresses with you — difficulty ramps as you get stronger, not on a fixed calendar.
- Personalized — built around the specific limiter actually holding you back.
- Tracks your progress — see what's working and adjust over time.
Free · a quick assessment finds your starting point
Related exercises
Frequently asked questions
What does the knee-to-wall test measure?
It is a practical screen of weight-bearing ankle dorsiflexion: how far the knee can travel forward while the heel stays down. The result can be affected by calf flexibility, ankle-joint motion, foot position, balance, and comfort, so it does not identify a single cause.
How far should my foot be from the wall?
There is no single distance everyone must reach. Begin close enough to touch the wall with the heel grounded, then move back gradually. Use the same setup to compare your two sides and to track your own change over time.
Where should I feel the knee-to-wall drill?
You may feel a mild stretch around the lower calf or a general sense of motion at the ankle. You should not force a sharp front-of-ankle pinch, pain, numbness, or tingling.
Why does my heel lift during the drill?
The current foot-to-wall distance may exceed the ankle range you can control, or the foot may be turning out to compensate. Move closer, slow down, and keep the heel and both sides of the forefoot grounded.
How often can I do knee-to-wall mobilizations?
The page's suggested three sets of ten controlled repetitions per side is a reasonable practice dose when the movement is comfortable. Your program may prescribe a different frequency. Stop if symptoms increase and seek clinical advice for persistent pain or a hard movement block.